Running a Program in the Keil Simulator
Having loaded a program as code and assembled it, you need to run it. You can either continue from where you left off after assembling the code with Build target, or you can start afresh and load the code.
If you load the ARM simulator, it will open in the same state you closed it (i.e., the project and source file loaded). If the project is not open, select the Project tag, and then select Open Project.. from the pull down window. If you are not in the correct directory, select the appropriate directory in the normal way. Then click on MyFirstExample.uvproj which is the name of the project we set up, and then click on the Open tab. This loads your project and you are ready to go.
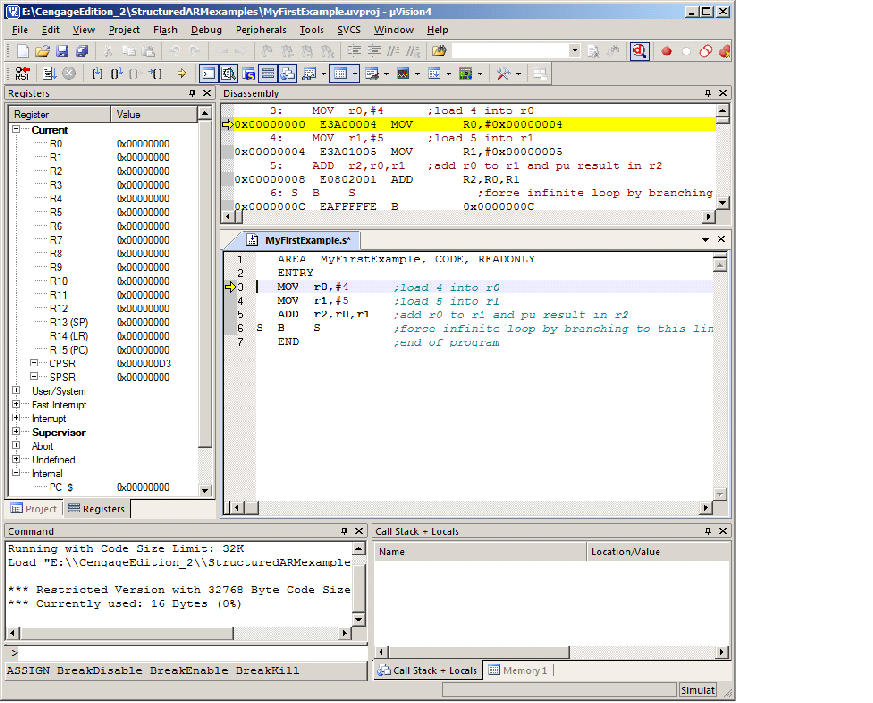
To run the code select Debug from the top menu. From the pull down menu select Start/Stop Debug Session. This brings up a message telling you that you are in the EVALUATION MODE and you click OK to dismiss it. You should see a screen like the one below. You can operate on it exactly like any other Windows application and use the View tab to open other Windows (such as display memory).
Now you can execute code. We are interested in the instruction-
This is the step-
You will be able to see any changes in the registers on the left. You will also be able to see the value of the program counter, PC, and the status register, CPSR. Note that function key F11 performs the same operation.
When you’ve finished, you must click on the Start/Stop Debug Session item under the
Project menu. This returns you to the source code which you can change as necessary.
After you’d changed it you must use the Build target command again to perform a re-